Showing posts with label quilt. Show all posts

June 8, 2013

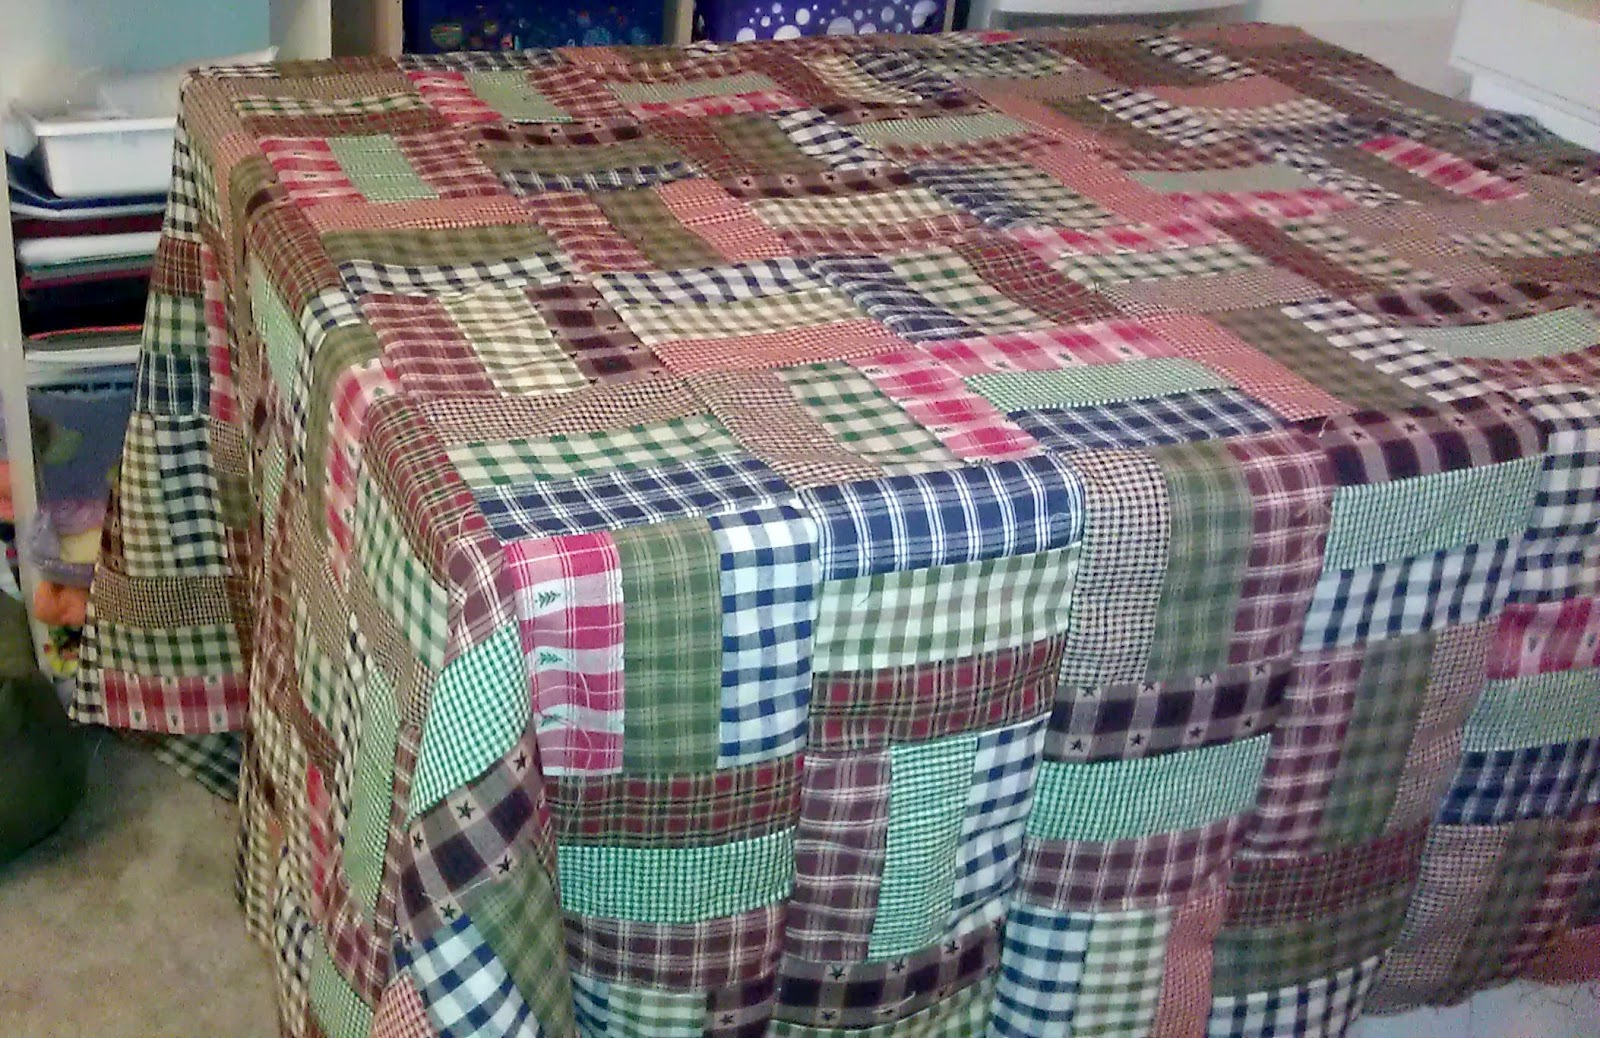
Homespun Honey Quilt: All Done!

Remember this quilt? I do, believe it or not. It's one of my leftover 2011 (technically started in 2010) projects that I promised myself I would finish up before starting anything new. Please excuse me for a moment while I laugh and laugh and laugh.


Projects with no particular deadline in mind seem to languish on and on around here. I whipped up the Little Hexie Quilt in practically no time compared to this quilt (4 months). But it had a due date. While I will concede that it's much smaller, and should take less time, the design of that quilt was much more complicated. But, taking nearly 3 years to complete a quilt is certainly the longest time I've spent on one.


I made this one for hubby to use on the bed. As I've mentioned before, he's a terrible blanket thief so we don't share blankets, otherwise all my blankets end up no longer on me. He had been using a store-bought quilt I've had for ages, but it's been getting a little ratty. I finished this one just in time.

The pattern itself was fairly simple- just making 6" wide strip sets of three homespun fabrics and then cutting the strips sets into 6" squares. Then I stitched them together, alternating their placement vertically or horizontally. Not complicated, but time consuming. I had the strip sets sew up for a long time before I got around to cutting the squares.


I added a border to it with this nice green plaid that has nice stars on it. That wasn't in the original plans, but I really liked it when I went to pick out the backing fabric. This project, though, since it took a long time, does suffer a little bit in places. My skills in cutting and piecing have increased since I started it, and it was a little frustrating trying to work around mistakes I had made.

I did a simple stitch-in-the-ditch to quilt it all together. Nothing fancy, since I wanted it to keep the rustic feel of the homsepuns. I really like how they came together, I'd like to work on another project with them sometime in the future.

Of course, as soon as I set out the quilt, my "helper" had to test it. This quilt, like all other quilts, blankets, fabric, fabric scraps, and clothes left on the floor, is Piper tested and Piper approved for comfort. I eventually had to lock her out of the room to get a decent picture of the quilt on the bed without interference.


I'm glad this one is finally finished. Perhaps now I'll learn not to let projects hang over my head for ages and ages... but probably not.

May 25, 2013

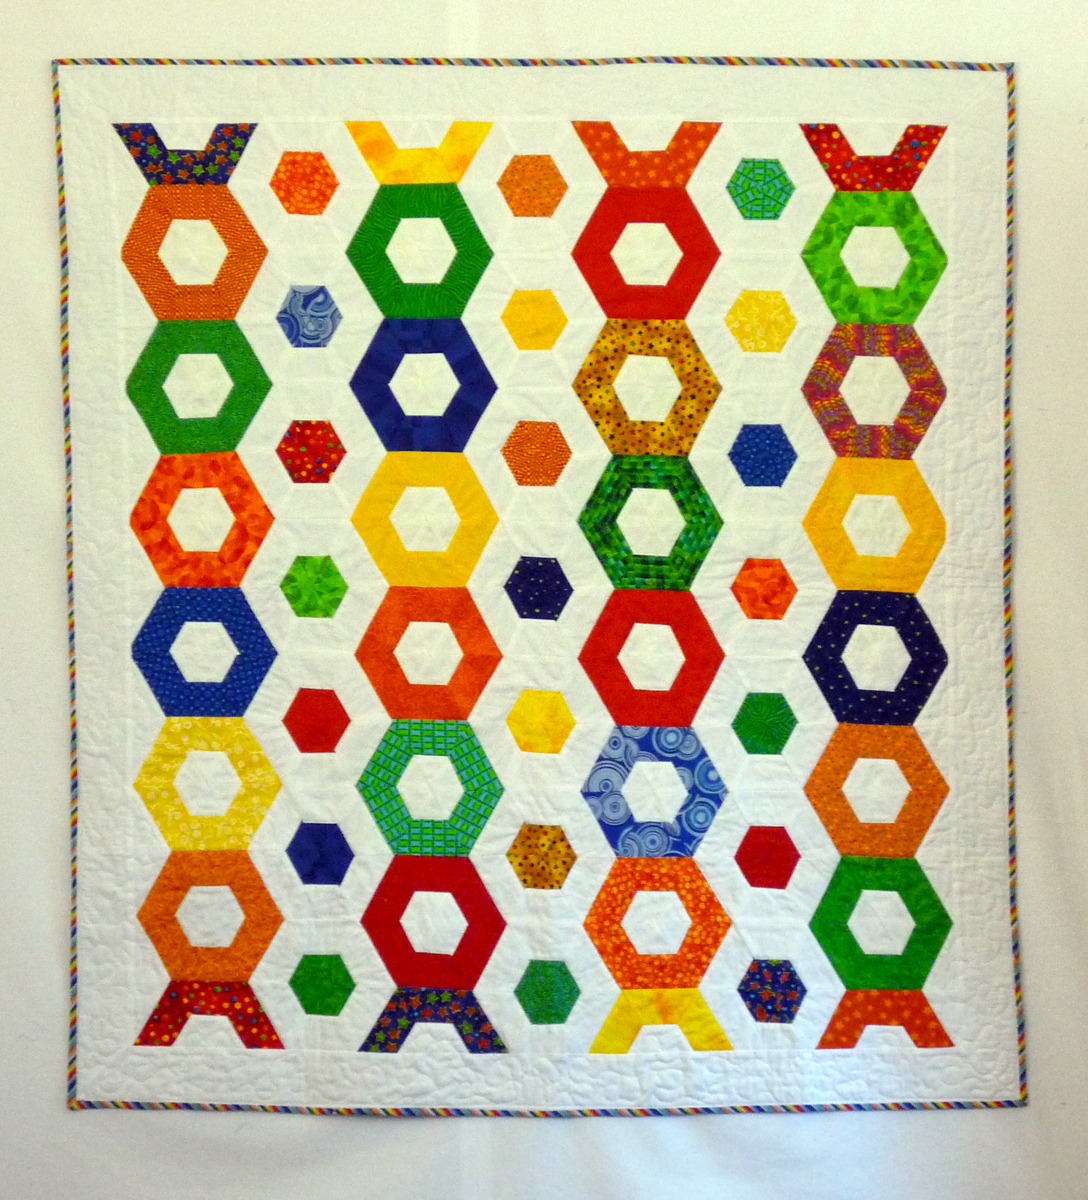
Little Hexie Quilt All Stitched Up!

I usually have 2-3 projects that I'm working on at once, but sometimes (like now) I get a little carried away and it turns into 5-6. That's when I know it's time to pick up the most complete project and put the finishing touches on it.


For about two weeks, this quilt had been sandwiched and half quilted. The binding was even already pressed. So I had no excuse not to sit down for a couple hours and finish up the quilting. Of course, I also had a deadline to finish it by- the baby shower!


I'm very happy with how it turned out. It's my first time making a pattern like this, and I was worried that the corners of the hexagons wouldn't match up. For the most part, though, they matched up very well, it's only a few spots that are noticeably off. I did rip and restitch a few of them that were really bad.


The colors worked together far better than I had thought they would. I had a hard time finding enough bright reds and blues to fill out the quilt, but for the most part, all the colored fabric came from my stash. The white background, as it happens, came from my stash, too. A while ago there was a nice white quilting cotton on clearance, so I bought the whole bolt for almost nothing.


Choosing the binding was possibly the most difficult part. I couldn't find anything that I liked. I ultimately ended up with this stripe because it closely matched the tone of the prints. And I really do love cutting bias binding from a straight stripe pattern and ending up with diagonally striped binding. You can't go wrong with it.


The backing I bought after the top was finished. I wasn't sure which color would have the right feel until the top was finished. I brought it with me to the fabric store to hold it up against several colors. There was also a red that I liked, but ultimately, I went with this blue dot print because it looked better with the binding than the red did.

I really enjoy making quilts, but even better is when I give them away.  Here's the happy mama-to-be! I'm endlessly excited for my aunt and uncle- this is their first little one!


Now, only 4-5 more projects are on my quilting table. Time to finish a few of them up! I just started attending classes at night, after a year or so of thinking about it, and obviously my quilting time has diminished. But I have several almost-done quilts that won't take too long to sew up if I dedicate a few Saturday mornings to the effort.

January 2, 2013

Blue and Grey Mod Table Runner

Back in the fall, my mom asked me if I could make her a table runner and matching table topper to go on the buffet table and kitchen table she has in the kitchen. She wanted something for everyday use that matched the colors there but couldn't find anything ready-made. A phone call and a few notes later, I had a good idea of what she was looking for. The result:


I started with a free pattern from All People Quilt that had the basic pattern I liked, but in the wrong proportions and relied on a specific fussy cut fabric to create the interesting effects in the middle of the block. I made it in a totally different size to fit the proportions my mom wanted and I left off the triangles at the end to make the ends pointed (as requested).

 
For the center of the blocks, instead of fussy cutting fabric, I actually appliqued some crazy cut fabrics onto the teal backing fabric. I took my 5" square ruler and just sort of made a medium crazy rectangle and a small crazy rectangle.


I used a single block to make the table topper for the kitchen table. All the Christmas decorations were still out when I left, so I didn't get a chance to see them in action. Mom promised to send me a photo of them 'in the wild' once the decorations get put away.

December 28, 2012

Butterfly Applique Wall Hanging

I am SO glad I can finally share some of the holiday gifts I made over the last two months. You wouldn't know it from the blog posts, bus since November I've really been doing a ton of sewing. I just couldn't share anything for fear of recipients seeing their gifts early. But they've all been given now, so I am free to post about all of them!


First up is the wall hanging I made for my mother in law. She really likes butterflies, so I wanted to make her something that incorporated butterfly fabric. But, I had a hard time finding any butterfly fabrics that I thought would appeal to her (there are lots of cute options for babies, though).

Eventually I settled on making butterfly appliques. The appliques I used came from Lollychops, which has a printout of them available for free. There are a few different styles, and if you wanted to get really clever you could easily resize them on your printer to make them larger/smaller to suit your needs.


It took me a little longer to do this than I thought, because it was what I was working on when it became time to service my machine. It started knocking, so that was my queue to turn it over to the serviceman. It came back a few days later than I expected it to, but it was good as new so I can't complain.


This butterfly fabric was too fun to pass up, so I used it for the backing of the quilt. We didn't get to see her this year for Christmas (it's too far to travel to see both our families at the holidays, and this year was my family's turn) but I mailed it to her instead. She got it just in time for Christmas, and didn't even cheat by opening it early.

I'm happy to report she loved it and even had a space to hang it on the wall. It ended up being a little larger than I had set out to make it, and I was hoping she'd be able to find a place for it. She was kind enough to send me a photo of it hanging in her house.

November 18, 2012

Floral Table Runner

Sometimes I see a fabric that I just cannot walk away from. This time, though, it was a little fat quarter bundle of floral fabrics that caught me. I picked up it ages ago and for the longest time didn't know quite what to do with it. Isn't that always the way? Two thirds of my stash is "I'll figure out something to do with this" fabric.


I finally sat down and worked out a pattern for this bundle and came up with a little table runner. Originally I had thought to make it for my coffee table, but we have since gotten a new (and smaller) one. Now I don't need it after all.


It quilted up very quickly as it isn't too large. The big white floral pattern is what initially drew me to the bundle. The flowers have just the right amount of whimsy.

 
I finished it up just before I sent my machine out to be serviced. Ever since I've been doing a lot of cutting for my holiday projects. I also resurrected my old workhorse machine to do a little bit of straight stitching. It can still run a decent straight stitch, if nothing else.

I wish I could post about all the holiday projects I'm working on, but they'll have to wait, lest I ruin the surprise for anyone. But at the rate I'm going, I'll probably be posting about holiday gifts until February. It looks as though I will actually finish them all on time, too. It'll be a Christmas miracle if I do. I hope your holiday projects are going as swimmingly as mine.

Since we swapped our big coffee table out for a smaller one, this piece is available on my Etsy page.

November 14, 2012

The Coffee Quilt: When Your Mug Isn't Enough

People love coffee. It's a fervent love, but one that I do not really understand. You see, I am a tea person. I know many die-hard coffee people, though, and there's something mystical about the way their eyes light up when they take a sip of coffee. Maybe it's a cult?


I decided to make a little coffee-inspired quilt when I found the Java collection by Moda. It was too fun to pass up, especially since I managed to get it during a clearance sale (sadly it was a sale from a local quilting shop going out of business). The panels were easy to work with and this stitched up pretty quickly.

It's one of several small projects I've had sitting around for a while and I finally said "enough" and finished them up. It's a good thing, too, because I just had to give my sewing machine up for its annual servicing. Toward the end of my most recent project (a holiday present) it also started making a suspicious noise, so it was definitely time. I must say, now that I can't sew, I miss it more than I thought I would.

I'll have it back in about ten days, and then the furious rush to finish holiday gifts begins. In the mean time, I am cutting out the fabric for these projects. While not as soothing as sewing, cutting fabric helps to slake my sewing urges.

September 14, 2012

Homespun Honey Quilt: The Top

After much delay, I finally finished the top of the Homespun Honey Quilt I've been working on for quite some time. Between the sewing machine death and and other projects getting in the way, this one fell to the wayside.


I haven't quilted it up yet, but it's ready to go whenever I am. I have the backing and I bought some fabric recently to make the binding. There should be some batting laying around with this project in mind, too.

Lately I've been on a project finishing kick and hopefully this one will get sucked up in that finishing fervor. There were a lot of projects I had laying around (something in the vicinity of 16) so finishing things up and not starting new projects has been really good.

September 5, 2012

Eek! A Halloween Mini Quilt

 This mini quilt came from a quilting magazine I like a lot, Quilts and More. In the most recent issue for fall, there were two patterns for cute Halloween pillows. The finished pillows were 22" square, but I really don't have anywhere to use them. Instead, I decided to use the spiderweb applique pattern to make a mini quilt.

 
The original applique pattern was intended for a 22" pillow, not a 12" mini quilt, so I had to do a little tinkering. I scanned the original applique from the magazine pullout into my computer. I had to do 4 separate scans, because my scanner isn't large enough to capture the whole image at once. I stitched the image back together on the computer, and then shrank it down to fit in the center square, about 8".

It only took about 40 minutes from start to printing out the resized applique. After I cut out the applique, it took about 4 hours to cut, sew, applique, quilt, and bind this little guy. Fall, in my opinion, starts on September 1st, so this Halloween addition to my decor is only a wee bit early.

I've started drafting some designs for other mini quilts- including a fall one and a snowman. I've been a bit under the weather the last few days, but with any luck I'll be able to get them finished by next week. Those patterns will be available on my Etsy shop after I've tested them out and worked out the instructions list.

September 3, 2012

I Pinch! Mini Crab Quilt

After finishing up a large project like the Halloween Circle Quilt, I like to take some time to work on a smaller project. Nothing big or fancy, just something I can finish in a couple hours or an afternoon. I bought a small table-top quilt hanger ages and ages ago along with a small quilt kit to fit on it.

 
I thought it was about time I finished this quilt up. I cut out the appliques and stitched the top together last summer and then set it aside for other things. With my big quilt finished, it was the perfect opportunity to finish him up.

I changed the applique a little. The crab had eyestalks in the original pattern- but any good Marylander will tell you that crabs don't have eyestalks! So I left those off and placed the eyes on his body. The quilt kit and frame came from the Wooden Bear, they had a booth at a show I attended last year.

They have two sets of "Little Quilts", one for each month of the year (and a birthday cake, too). For the most part, the patterns a little too folky for my taste but the idea of having a small frame to hang interchangeable quilts on really appeals to me. The frame itself will hold a 12"x12" quilt, but I could also fit one that's up to 16" long on it. This frame and several other sizes and styles are available from Ackfeldwire.

Before starting up another large project, I think I am going to design a few of these mini quilts. They take only an afternoon to complete and you don't need much fabric for them at all. I finished up a Halloween one already, but I see Thanksgiving and Christmas ones in my future.

August 29, 2012

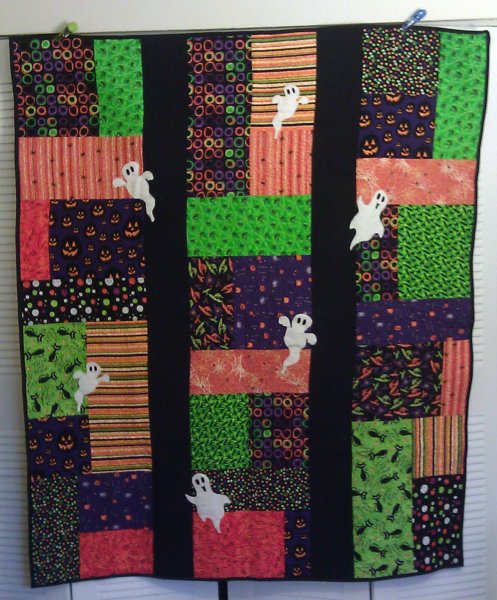
Halloween Circle Quilt: finished!

I wasn't able to finish quilting this one for ages, because of the machine snafu I had last fall. Then, the darning foot I needed for my new machine was out of stock for several months before I found out that was due to it being discontinued. This quilt has had quite a journey but, it's all sorted now.


I'm really happy with how it came out. The sashing is a solid black. I thought it would work best since the blocks themselves are quite busy. Inside of each block, I quilted spider web patterns.


I bought a Haunted Mansion layer cake by Moda and that's where the blocks and circles were cut from. I'd never used a layer cake before, but there was no resisting the siren call of such a fun Halloween themed collection.


The binding was made with one of the polka dot prints from the Haunted Mansion. I made it way, way in advance so it was ready when the top was finished. I hate nothing more than being ready to bind a quilt and chalk it up in the finished column and the binding isn't ready. I try to make it between cutting out the pieces and piecing the top.


I did a meandering stitch across the sashing and the border, which is my go-to quilting pattern. I don't prewash the fabrics I want to meander across, because the slight shrinking of the fabric after the fact gives it a delightful look and feel.

This quilt is currently for sale in my Etsy shop.

July 23, 2012

Quilting is Back On!

I finally found and received the darning foot I needed for my machine. Woo! I also bought a pack of 20 bobbins. You can never have too many bobbins, and since these are "exclusive" to my machine, I figured I'd better stock up. I love my L-500 to pieces, but the fact that it's no longer sold and supported means I will have a very hard time getting replacement components in the future. Very disappointing, especially considering the cost of the machine.

Isn't it lovely?
 Now I'm back in the saddle and ready to finish some project have have been hanging over my head for quite some time. The first up is the Halloween quilt! I know it's "Christmas in July" time, but Halloween is coming up sooner, so I decided to finish this one up first. It feels good to be back at the workstation.

 
Another eight hours or so of quilting and then it'll be ready for the binding. I'm very excited to finish up the quilted webs. They're not terribly complicated, but do involve a lot of maneuvering. Ages ago, I cut and pressed the binding, so once the quilting is finished, I can wrap it up in a breeze. I have a tight painting schedule to keep to for my Warhammer army, but hopefully I can sneak in some time this week to work on the quilt.

April 3, 2012

Quilting Month Bust

I started March pretty excited about National Quilting Month, but ended it without having gotten much done. I'm really disappointed in myself. I had a set list of projects to work on, and I did not get them all accomplished. I didn't even get most of them accomplished, actually.

Some things got done... but not much.
I finished Piper's crate mat, but that's all. Terrible. I worked on all of the others, but none of them are finished. I got the Java top finished and partially quilted, I made a humungous post about how to make continuous quilt binding, and I finished up many triangles for the stripes quilt.


In my defense, it turns out that I never could have finished the Halloween Circle quilt, because the sewing foot I need is of stock. I haven't yet been able to find one in a month of looking. I will have to set it aside for good until I can procure that foot. So that chopped my seven projects down to six.

The last week of the month, I had a surprise house guest, so I didn't have access to sewing while he was staying. But that's a terrible excuse, because I had two weeks prior to get things done, and I really didn't. My enthusiasm for the challenge didn't sustain me through the whole month.

I still have to finish those projects, since several of them are left over from last year. Next year, I'm going to try a little bit more motivational of a challenge, perhaps a well-planned block-a-day challenge.

March 9, 2012

How to Make Bias Quilt Binding

When I first started quilting, I bought pre-made binding because I had no real idea how to make my own. The palate was limited almost entirely to solid colors, and it was depressing. Somewhere along the way, I learned to make my own and it's my favorite quilting trick.

It's my favorite because most fabric collections have a print or two that would make fantastic binding. It matches the colors of the collection already, and you can use it to show off a print you liked and used a lot or one you didn't get to use at all. I also think using a print instead of a solid can really make a good quilt into a great quilt.

Now there are some distinct advantages to making continuous bias binding. It's more durable than straight grain binding, and it's incredibly useful on curves. I use it for almost all my projects. The best part? It's really easy to do! The first time you make it, it can be a little tricky to visualize exactly what to do. I made this tutorial with tons of pictures to help clear up some of the confusion at a few of the steps.

First, you'll need some yardage. How much depends on how much binding you need and how wide you want to make it. In the example, I use a 1/2 yard piece and cut it 2 1/2" wide. That gave me about 11 yards of 1/2" binding. If you make it wider, you'll end up with less binding, so plan your yardage accordingly.

Ready? Let's go!

Iron your fabric before beginning and then lay it out on your workspace with selvages on the sides (instead of top and bottom). Trim off the selvage edges.


Now you want to take the top right corner of the fabric and fold it over to give you a 45 degree angle, just like this:


You definitely want to make sure it's lined up properly along the bottom. I like to press it to give it a nice crisp edge, but you don't have to. Cut along the fold line.


Now take the triangle you just cut and slide it straight over to the left side. What you want to have is the two selvage edges next to each other, like this:


January 25, 2012

3D Inverse Pinwheel Quilts!

It took me a little longer to finish these quilts than I had intended, largely because I wasted so much time waiting for the fabric to arrive. I wasn't able to find it in my local quilt shops (I think I waited too long to look), so I had to order it online and apparently they shipped it from the moon.

Pink background.
 This is the one I finished first. I used a thin batting, since they're being shipped off to Hawaii tomorrow.

Brown background.
I used the stripe print for the binding on both. I tried out a new method to make the binding, and it really worked well. I think I'll do a little tutorial on it soon.

December 1, 2011

3D Pinwheel Blocks Tutorial

I had a lightbulb moment a few days ago when I opened up the fat quarter bundle of Indian Summer fabrics I bought for the twin baby quilts. Initially, I wanted to use a charm pack, but I couldn't get the number of each pattern that I wanted with them, so I opted to just cut what I need from the fat quarters. They were all folded up and it occurred to me that instead of traditional pinwheels, I should do 3D ones!

The fabrics I'm using for these quilts- all but 5 in the collection
In order to make these 3D pinwheels, you only need 8 fabric squares of any size you like. Mine all were 5"x5". If you use a charm pack, these blocks will fly together, because all the cutting is already finished! But, the larger your starting squares, the larger the block will be. My finished blocks were just over 9".

I decided to use the same background color for all the pinwheels, for the first quilt that is the pink.  Next you want to pick 4 coordinating fabrics to be the pinwheels- I chose all different ones but you could do them all the same if you'd like.

The pink floral is the background for all the pinwheels.
You want to fold each piece in half, (corner to corner) press, and then fold them in half a second time and press to get small triangles.

Press them all in half (the circles are my ironing board)
Then all in half again, to get small triangles.
I spent a good while just pressing all of the pinwheels for both quilts (there are lots of them). I like to watch TV shows while I sew, so I just popped in the first season of The Wire (It's the best television show ever made, bar none) and pressed triangles for a couple episodes.

October 14, 2011

Inverse Quilts for Twins

I am so excited to get started on this one, even though the fabric-buying stage has to wait until after the wedding. A long-time friend of Hubby-to-be's and his wife are having twins in January. I just found out that they're expecting two girls- so you know what that means! It's time to start planning the quilts.

I think it's a little weird how many parents dress their young twins exactly the same. Same shirt, same pants, same hat, same shoes- it just rubs me the wrong way. But, that's what some people prefer. So not knowing the parents-to-be as well as Hubby-to-be, I decided to make the girls' quilts using the same fabric collection, but with the colors inversed. So the quilts will compliment each other, but they won't be exactly the same.

I have been thinking about doing a pinwheel quilt for some time, and I thought this would be a good opportunity to try it out. I found a really neat little page that lets you make a mock up quilt from the International Quilt Study Center & Museum. With my vague idea of pinwheels, I made a mock up, which you can see here in pink and brown. There were a surprising number of ways to customize the quilt. I made it 3 blocks by 4 blocks since it will be sized for infants, but you could scale it up even more.

I think pink and brown are cute but modern colors for girls that are better that the traditional pink, pink, and more pink that I've seen. I also don't know how the parents are planning to decorate, so I wanted something that would likely mix in with whatever they choose. After planning out my design ideas on the website, I decided I would need a collection with at least 12 fabrics with a variety of small-medium prints.

I spent most of the day searching, and I definitely found the perfect collection from Riley Blake, called Indian Summer.There are 23 prints, mostly in pink, brown, and cream. It's adorable, and the variety of prints is perfect for making the pinwheels. I can't wait to get started!

September 8, 2011

Flynn Quilt Frame Review: The Set Up

I would first like to point out that I do enjoy the Flynn Multi-Frame. I really do. That being said, I do have some frustrations to vent out. It comes with 48" rods for you to roll your quilt, batting, and backing onto. That means you can put a quilt top up to 40" wide on it (there needs to be 4" to spare on either side). That Halloween quilt I wanted to put on it? It's 56" inches wide. So right off the bat, I had to buy new goodies for it.

After going to 3 different stores to find the conduit I needed, I had the appropriately sized rods. I bought double sided tape because I couldn't find any carpet tape, which is what the company recommends. I used some muslin from my stash to make the leader strips. The tape stuck to the rod, but not to the fabric. So I doubled down with some packing tape and secured the muslin with it. It took forever, but thankfully, I only have to do it once per set.

Then came rolling the backing onto the the rod. You're supposed to baste the backing to the muslin, then roll it up. Sounds simple enough, right? In order to get it rolled up nice and straight on the rod, I had to try and fail more times than I care to admit to openly. The company recommends rolling them up on the carpet. I don't, unless you don't have a choice (however, I do). The table results were much better.
Getting the top and batting rolled together was the easier part.

September 7, 2011

Seascape Quilt, Part 2

I initially started this project to fill the empty wall in my apartment. Now that we actually moved, I intentionally left a blank wall in the living room for it. It'd be a shame to have it finished but no where to put it. I have the first major step completed, the top itself is now finished!

Sorry it's a little blurry.

I'm really happy with how the colors seem to blend together on the right, not so much on the left. A lesson for next time. I think it will be a lot less noticeable once it has the sea critters on it. I am putting some jelly fish, an octopus, and some plant life on there for sure. I don't know exactly what else I will do yet. I have some interesting notions that I have been saving just for this. I'll just have to see what comes to me.

This one likely will not end up getting quilted once I'm finished with it. Once I appliqué the sea creatures and embroider the details, I will probably finish the edges and hang it up as-is. I'm not allowed to put any nails in the walls here, so a traditional quilt hanging method is out of the question. I am a fan of those 3M sticky tabs, and without the added weight of batting and backing, I've successfully hung smaller quilts that way previously. If that doesn't do the trick I might end up just using thumb tacks (gasp!). Maybe I don't want to go poking holes through my new piece of art.

September 5, 2011

Halloween Circle Quilt

This little number has been hanging out in my stash since last September. On a whim, I bought a Moda Layer Cake from the Haunted Mansion collection. I had never experimented with the precuts before that, so I was really excited to try it out. I ended up having no idea what to do with it for a while. Then, I found a fabric with a concentric circles pattern on it, and the inspiration for this quilt was born.
After assembling the blocks was as simple, but then I didn't know what to do with them. The black sashing is simple to make the Halloween prints really stand out. The border and backing are both from the collection, and I made the binding from one of the collection's prints, too.

September 1, 2011

The Most Wondeful Time of the Year (is almost here)

A lot of people dig the winter holidays most of all the year's celebrations. While I am certainly a fan (especially now that I celebrate both Christmas and Chanukah because of Hubby-to-be), neither are my favorite. Hands down, more than anything else, Halloween is the best holiday ever (for me). I loved it as a kid, I really loved it as a college student, and I love it still (and probably always will). There is something about dressing up, handing out candy, and all those messy spider webs that I just can't get enough of.

I usually have a day-long house decorating party (with myself) on October 1st to kick off the holiday. However, this year, I decided that if all the stores can start selling Halloween stuff in August, I can bring out a few of my favorite items a little early to enjoy them longer. One of my most favorite items is a new addition from last year: a Halloween quilt.

Related Posts Plugin for WordPress, Blogger...