December 30, 2012

2012: Year of the Craft

2012 was something, wasn't it? I split the blogs into two pages, the original one here reverted back to its intended purpose- quilting and recipes. My new blog became all about wargaming and miniatures hobbying. It's a change I was hesitant to make at first, but certainly was for the best.


If you recall, at the end of 2011 I set some goals for myself for the upcoming year. Let's assess how well I did in meeting them:
  • Blogging Consistently: I definitely think I  kept up a good and consistent pace this year. Now to keep it going for 2013.
  • Finishing Dwarfs: Well, since I split the blog into two this year, this got covered over there, but no, I did not entirely finish them.
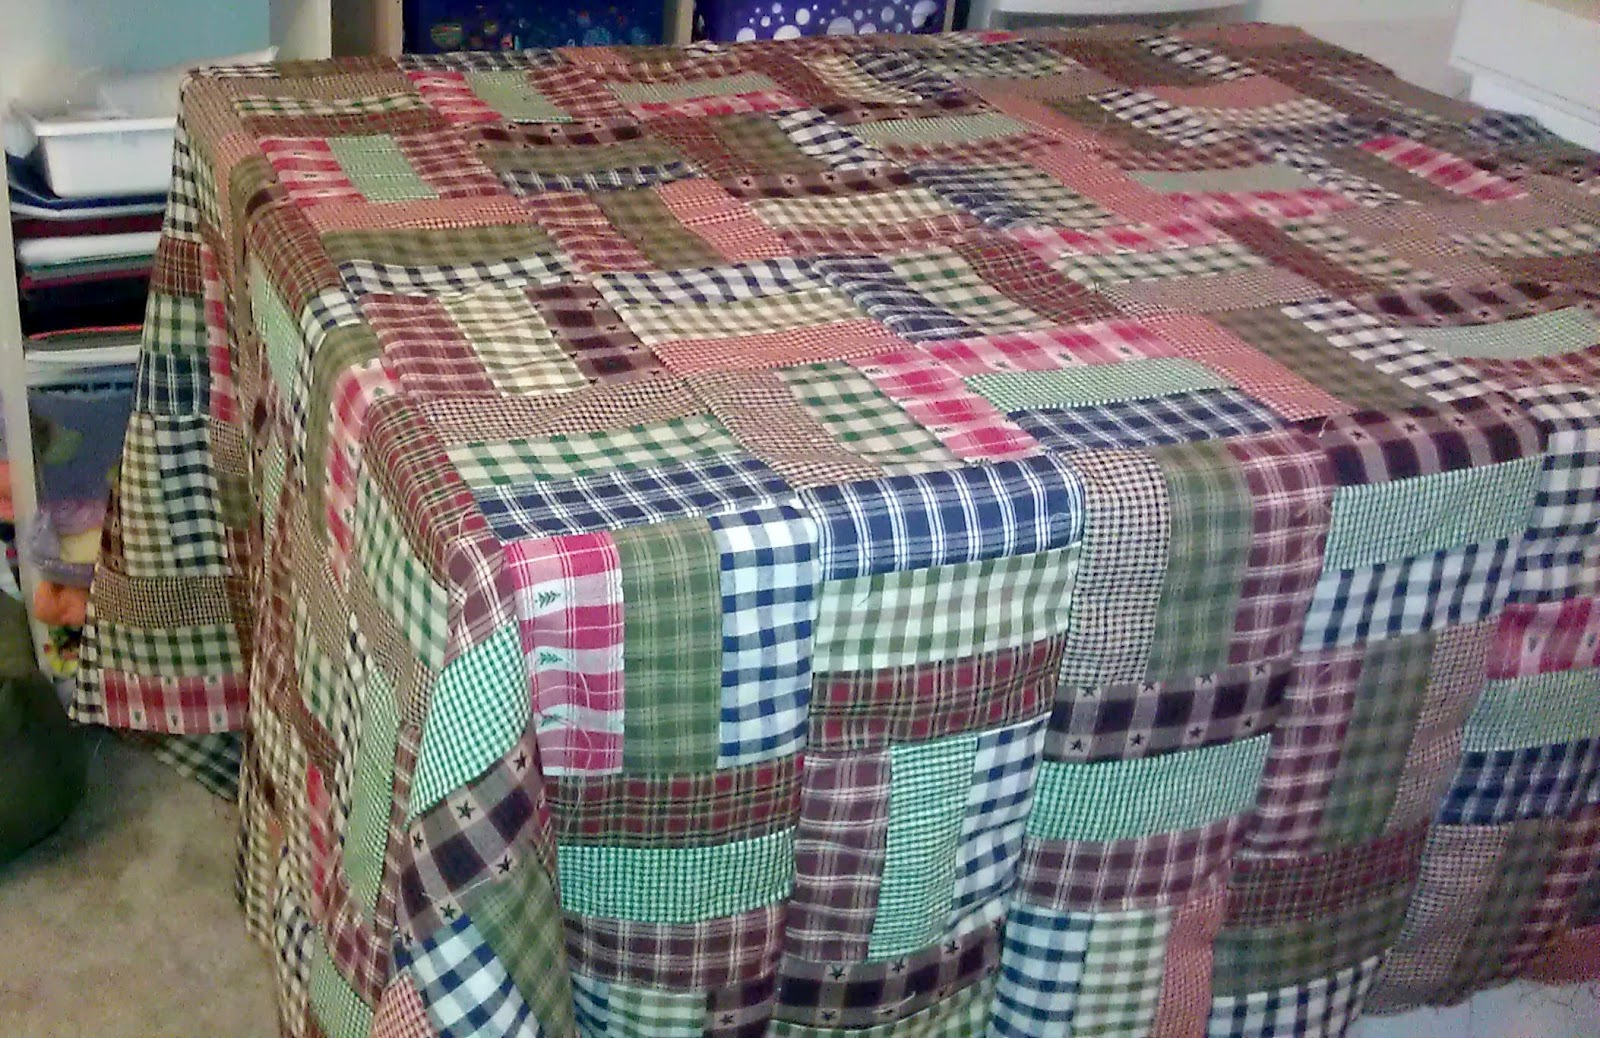
  • Finish UFOs: I actually did finish most of my Un-Finished Objects that I had laying around.
  • No new projects: Hahahahahaha. That didn't happen.
  • More recipes, more photos: I actually had a ton of recipes over the last year and they all had photos to go with them. I even added photos to recipes that lacked them.
  • Poor Etsy No More: I started up the shop again, added several new items, and had a few more sales. Over all, a good start but still needs improvement.
I would say I scored a 4 out of 6 goals. I gave myself half credit for the Dwarfs (since 80% of them are painted) and half credit for the Etsy page improvements. All in all, that's not too bad. I really flubbed the dog on not starting new projects until I finished all my old ones. But, honestly, that's to be expected.

With those goals in mind, I came up with some things I'd like to accomplish in the coming year. Aside from just keeping on with that I've been doing, I've added a few things.

2013 Goals:
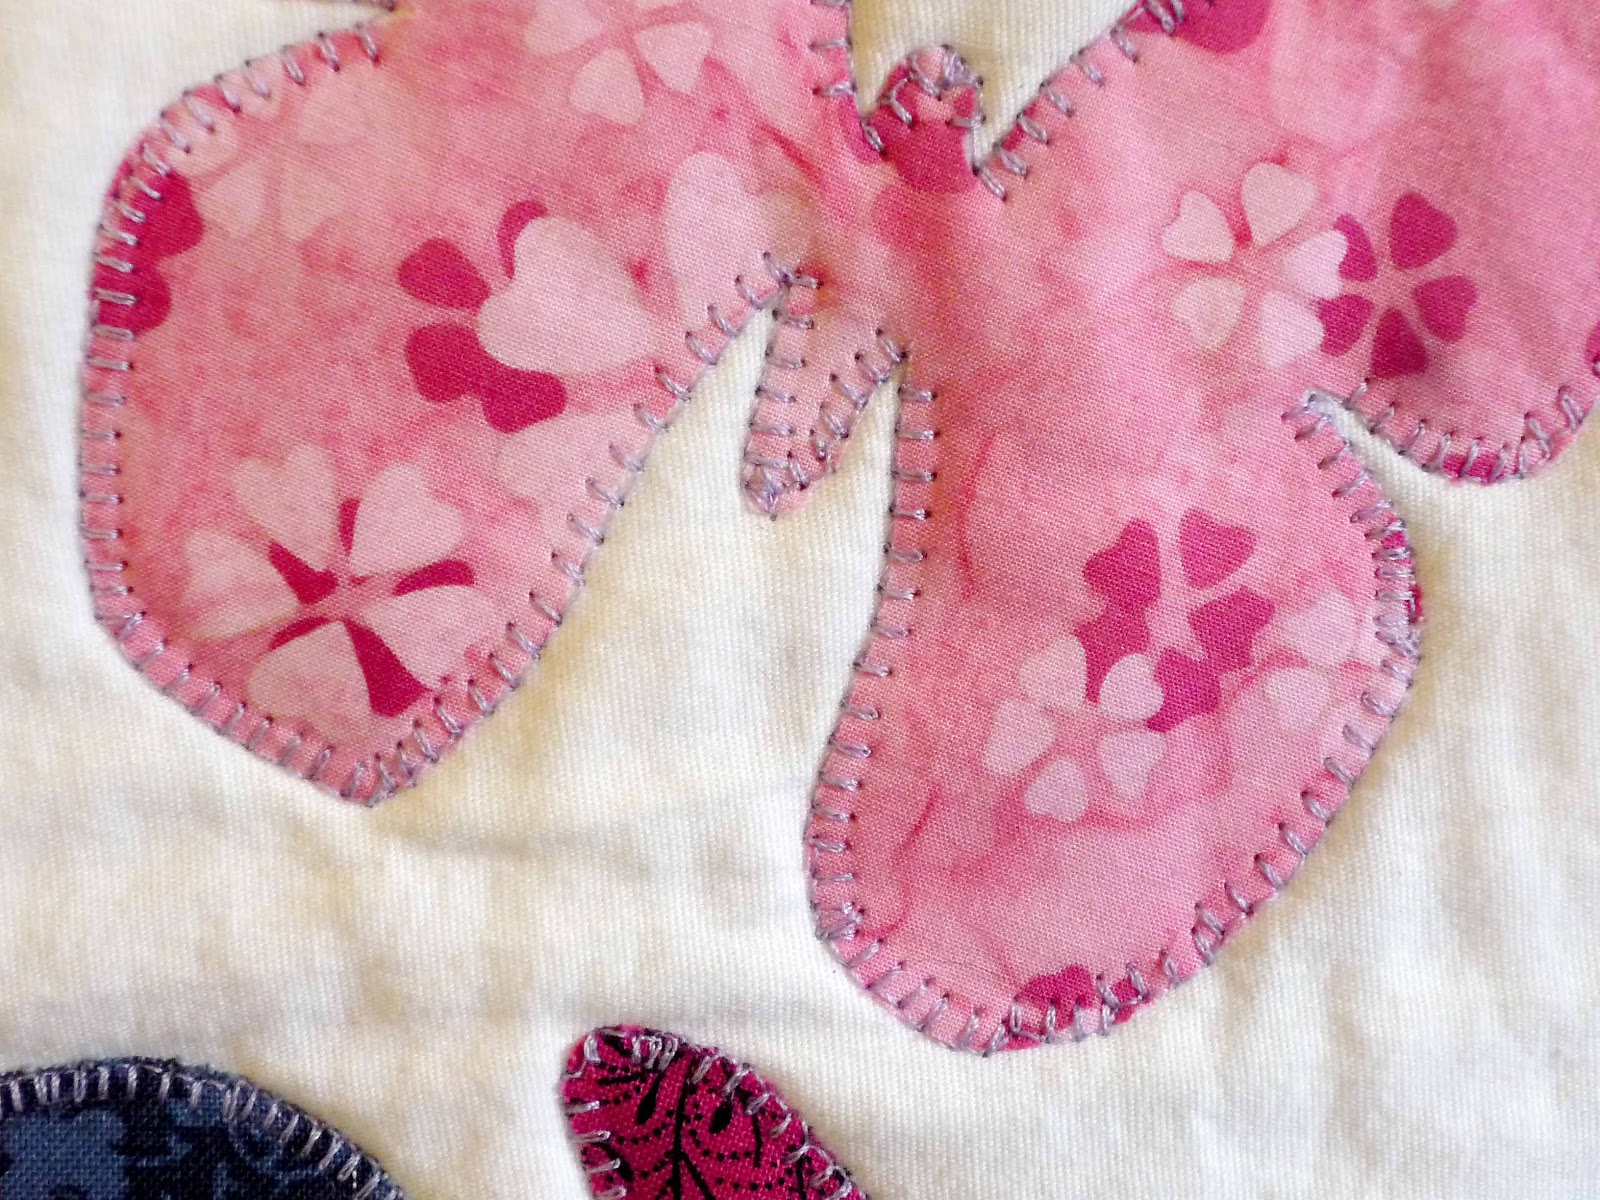
  • I'd like to work on expanding my quilting and sewing posts. My primary purpose in starting this blog was to catalog my sewing adventures, but 2012 was very recipe heavy. I want to post more evenly in the future.
  • More for Etsy: I added some new items recently, but I need to work on some more projects to add to my shop.
  • Mini Quilts: making a set for the whole year, ones for my personal use and ones to turn into patterns for the Etsy page.
  • Keep my UFOs to a minimum: I don't have that many UFOs right now, and I want to try and make sure that I only have a few (5 or less) projects going at one time. Right now I have 3 projects, so I'm doing well.
This seems like a very manageable set of goals. What hurdles are you setting for yourself in the new year?

December 28, 2012

Butterfly Applique Wall Hanging

I am SO glad I can finally share some of the holiday gifts I made over the last two months. You wouldn't know it from the blog posts, bus since November I've really been doing a ton of sewing. I just couldn't share anything for fear of recipients seeing their gifts early. But they've all been given now, so I am free to post about all of them!


First up is the wall hanging I made for my mother in law. She really likes butterflies, so I wanted to make her something that incorporated butterfly fabric. But, I had a hard time finding any butterfly fabrics that I thought would appeal to her (there are lots of cute options for babies, though).

Eventually I settled on making butterfly appliques. The appliques I used came from Lollychops, which has a printout of them available for free. There are a few different styles, and if you wanted to get really clever you could easily resize them on your printer to make them larger/smaller to suit your needs.


It took me a little longer to do this than I thought, because it was what I was working on when it became time to service my machine. It started knocking, so that was my queue to turn it over to the serviceman. It came back a few days later than I expected it to, but it was good as new so I can't complain.


This butterfly fabric was too fun to pass up, so I used it for the backing of the quilt. We didn't get to see her this year for Christmas (it's too far to travel to see both our families at the holidays, and this year was my family's turn) but I mailed it to her instead. She got it just in time for Christmas, and didn't even cheat by opening it early.

I'm happy to report she loved it and even had a space to hang it on the wall. It ended up being a little larger than I had set out to make it, and I was hoping she'd be able to find a place for it. She was kind enough to send me a photo of it hanging in her house.

December 24, 2012

Merry Christmas from LTL!

May your holiday be filled will good company, great food, and maybe a few warming libations to keep the weather away.

Be Jolly!
  Hubs, Piper, and I have already arrived at our holiday destination, but I hope you all have safe travels.  Happy Holidays to you all!

December 20, 2012

Spent Grain Dog Treats

My dad has really gotten into brewing his own beer since the summer, and after each batch, he's left with a big pile of spent grains. He tossed them the first few times, but later learned you can save the grains and use them to make things like bread... and dog treats!

We have no shortage of dogs barking around in the family, so I took what he had recently and turned them into dog treats! Piper, my mischievous hound, and Dante, my parent's dog, both really love the first batch my dad made. I took some tips from him when he made them and improved on the recipe to make it possible to use cookie cutters on them- bone shaped cookie cutters!


Baking these was essentially a waking nightmare for Piper, or so she'd have you believe. She knew what they were, smelled them for over 4 hours, and could see them cooling on the counter. I should go to jail for putting her through this kind of extensive torture.

Beer Grain Dog Treats
makes approximately 30 treats, depending on the size of your cutter

What You'll Need:
2 1/2 cups (approx) of spent beer grains that have not been mixed with hops*
1 cup peanut butter
2/3 cup flour (all purpose or whole wheat)
1 egg

The Process:
Mix all ingredients together well. I used a wooden spoon at first and then finished it off by mixing with my hands. If it's still really sticky, add a little more flour. If it's too dry, add a little bit more peanut butter. Chill in the refrigerator for an hour. Preheat oven to 225 degrees. Roll out dough to about 1/4" thick and cut out desired shapes until all the dough is used.

Place cut biscuits onto a cookie sheet lined with parchment paper. Bake for 2 1/2 hours, turning them after 90 minutes, until they're really well dried out. Using hot pads, break one in half to make sure they're dried all the way through. Cool completely and store in an airtight container.

*Hops are toxic to dogs, do never use grains have been mixed with hops.


I had three different kinds of grains on hand, so I made quite a few of these (almost 150), but they're getting spread around between four spoiled dogs. Poor Piper has been stalking the kitchen all evening. Too bad she has to wait until Christmas for these.

December 18, 2012

Colombian Beef with Cane Sugar Syrup

For the inaugural Supermarket Surprise! segment, I purchased an interesting pancake of compressed cane sugar called panela. I figured I couldn't go wrong with something that was essentially a brick of sugar.


I spent a little time searching around the internet for what to do with it. Almost everything I found at first was called Aqua de Panela, essentially a drink made from dissolving the sugar in water. That felt like cheating, since it wasn't much of a recipe. The search continued.

Eventually, I found a Colombian beef roast recipe called Muchacho con Melao de Panela, from My Colombian Recipes. The roast is rubbed in spices and vinegar and left to marinade for two days prior to cooking then you pour a sugar syrup over it for serving. I made a few changes, the first being that I cooked it in the crock pot.

I can best describe panela as "rich brown sugar". It has a similar color, smell, and texture to brown sugar but the taste is somewhat richer. The panela syrup smelled so delicious while it was cooking. I made more than we needed for the roast, but I brought the remainder to a holiday party and we used it over ham. It was also very delicious.

I accidentally forgot to take a photo until after we had started eating.
Colombian Beef with Cane Sugar Syrup
makes one roast, adapted from My Colombian Recipes

What You'll Need:
3 pounds rump roast
3 Tbs white vinegar
1 Tbs cumin
1 small onion, finely chopped
6 minced garlic cloves
1 Tbs dry mustard
4 diced scallions
1 Tbs thyme
1 tsp salt
2 tsp pepper
2 cups of water
3 bay leaves
1/4 cup melao de panela
     8 oz panela
     2 cups water
     1 tsp cinnamon
     1/2 tsp cloves

The Process:
   Two days ahead of time, mix the white vinegar, ground cumin, mustard, onion, scallions, thyme, salt, and pepper. Rub the mixture over the beef. Place the roast in a dish, cover, and let rest for 2 days in the fridge.
   On the day you want to make it, heat a little olive oil in a skillet and brown the roast on all sides. Place the roast in your crock pot. Add the water and bay leaves. Cover and cook on low for 6-7 hours until internal temp reaches 160 degrees.
   Anytime before the roast is finished, make the melao de panela. Mix all the ingredients in a small sauce pan and heat over medium heat for 30 minutes until well thickened. Make sure to stir it occasionally.
   Once the beef is fully cooked, pull out of the crock and let rest, tented with aluminum foil, for 15 minutes prior to carving. Spoon some of the syrup over each slice and enjoy!

December 13, 2012

Supermarket Surprise!

Lately, I've noticed that I eat a lot of the same things, over and over again. It's nice to have favorites, but variety is the spice of life! While I usually take the opportunity to try something new when the chance arises (like when I ate alligator in New Orleans), my kitchen isn't a place where that often happens.

There IS such a thing as too much mac and cheese.
Making the same things is easy (especially when you know the recipe by heart) but it gets boring. No matter how delicious something is, after the fifth or sixth time you no longer look forward to it. In the spirit of livening up my cooking, I've decided to start a new segment called Supermarket Surprise!

I'm fortunate to live near a grocery store that has a great selection of ethnic and Kosher foods, but I hardly ever venture into those aisles. I make a list of what I need and just go to the aisles where list items reside. Very little adventuring involved. But no more! There is a fantastic wealth of food stuffs in those aisles, and I haven't heard of most of them.

So once a month, I will be preparing a dish made with a "surprise" ingredient. Here's where the surprise comes in. I'll look for something that I haven't heard of before and I'll buy it, whether or not I have any idea of how to use it or prepare it. Then I'll go home, research it a little bit, try a recipe I found using that ingredient, and tell you about it.

Sounds easy enough, right? I already bought my first item. It's something a littler "safer" than I could have otherwise chosen, but I didn't want to throw myself into the deep end of new foods right away. I'm making it in a few days, so look for the follow up with my first Supermarket Surprise!

December 5, 2012

Condensed Cream of Turkey

Have you ever wondered what you should do with all the turkey pan drippings that's left over after you've made gravy? Wonder no more! I have an excellent use for them: cream of turkey soup.


The original recipe, for cream of chicken, came from Tammy's Kitchen. I adapted it to make some cream of turkey that I'll use soon when I make some turkey pot pie with all that leftover turkey we (still) have. The biggest change I made was doubling the recipe. I had a LOT of turkey broth, so I actually made 4x as much as the original recipe.

I ended up with 7 mason jars worth of condensed soup. It worked out very well, actually. Each jar is 2 cups when filled all the way, but since I was planning to freeze them, I left a little wiggle room in there.

Condensed Cream of Turkey
makes a little over 6 cups 

What You'll Need:
3 cups turkey broth*
2 tsp dried marjoram
1 tsp dried sage
1 tsp dried thyme
1 tsp rosemary
1 small minced onion
2 cloves minced garlic
1 tsp black pepper
1 tsp salt (more or less as you prefer)
1/2 tsp parsley
1/4 tsp paprika
3 cups milk
1 1/2 cup flour 

November 28, 2012

Thanksgiving Success!

I hope you all had a wonderful holiday weekend with your friends and families. I know I did. Dinner here was 100% a success. Despite my fears, no turkeys caught fire, were burned, or otherwise ruined in any fashion. And the rest of the food wasn't half bad either!


I could (and have been) eat this forever. I bought way too huge a bird and I ended up putting much of the dark meat into the freezer for making pot pie later. This is, however, sadly the last of the cranberry sauce. But, I'll be making it again next month so it's not gone forever.

Now that Thanksgiving is over, the apartment has been cleaned and returned to normal, it's nearly time to throw all that to the wind in preparation for Christmas decorations. Time certainly is flying by lately it seems. Speaking of time, is is nearly time for my sewing machine to come home and I'll be working further on my holiday gifts. I should even have enough time left to finish them.

November 20, 2012

Whole Cranberry Sauce

Turkey time is nearly upon us. I have brined several birds and I feel I'm heartily prepared for whatever Thanksgiving can throw my way. Bring it on, holiday foods! Since being responsible for the main staples of the meal wasn't enough, I decided I was going to try my hand at making my own cranberry sauce this year.

I have not been known to enjoy the cranberry sauce, which makes some people go crazy for over the holidays. I just never saw the appeal of something that retained its shape once released from the can. But I have seen the light- and homemade cranberry sauce is why. This tangy but sweet combination will now never be missing from my Thanksgiving table.


This is ridiculously simple to make, and the only ingredient you probably don't have is the cranberries themselves. In fact, if you're feeling up to braving the crowds at the store, you still have plenty of time to make this recipe for Turkey Day. It's very quick to make.

Whole Cranberry Sauce
makes about 2 1/2 cups

What You'll Need:
1, 12oz package cranberries, rinsed
1 cup orange juice
1/2 cup white sugar
1/2 cup brown sugar
1/4 tsp cinnamon
1/8 tsp ginger
2 Tbs amaretto (optional)

November 18, 2012

Floral Table Runner

Sometimes I see a fabric that I just cannot walk away from. This time, though, it was a little fat quarter bundle of floral fabrics that caught me. I picked up it ages ago and for the longest time didn't know quite what to do with it. Isn't that always the way? Two thirds of my stash is "I'll figure out something to do with this" fabric.


I finally sat down and worked out a pattern for this bundle and came up with a little table runner. Originally I had thought to make it for my coffee table, but we have since gotten a new (and smaller) one. Now I don't need it after all.


It quilted up very quickly as it isn't too large. The big white floral pattern is what initially drew me to the bundle. The flowers have just the right amount of whimsy.

 
I finished it up just before I sent my machine out to be serviced. Ever since I've been doing a lot of cutting for my holiday projects. I also resurrected my old workhorse machine to do a little bit of straight stitching. It can still run a decent straight stitch, if nothing else.

I wish I could post about all the holiday projects I'm working on, but they'll have to wait, lest I ruin the surprise for anyone. But at the rate I'm going, I'll probably be posting about holiday gifts until February. It looks as though I will actually finish them all on time, too. It'll be a Christmas miracle if I do. I hope your holiday projects are going as swimmingly as mine.

Since we swapped our big coffee table out for a smaller one, this piece is available on my Etsy page.

November 14, 2012

The Coffee Quilt: When Your Mug Isn't Enough

People love coffee. It's a fervent love, but one that I do not really understand. You see, I am a tea person. I know many die-hard coffee people, though, and there's something mystical about the way their eyes light up when they take a sip of coffee. Maybe it's a cult?


I decided to make a little coffee-inspired quilt when I found the Java collection by Moda. It was too fun to pass up, especially since I managed to get it during a clearance sale (sadly it was a sale from a local quilting shop going out of business). The panels were easy to work with and this stitched up pretty quickly.

It's one of several small projects I've had sitting around for a while and I finally said "enough" and finished them up. It's a good thing, too, because I just had to give my sewing machine up for its annual servicing. Toward the end of my most recent project (a holiday present) it also started making a suspicious noise, so it was definitely time. I must say, now that I can't sew, I miss it more than I thought I would.

I'll have it back in about ten days, and then the furious rush to finish holiday gifts begins. In the mean time, I am cutting out the fabric for these projects. While not as soothing as sewing, cutting fabric helps to slake my sewing urges.

October 31, 2012

Dragons and Knights and Steeds, Oh My!

Halloween is my most beloved of all the holidays. Between the food, the weather, and the sheer festiveness in the air, I can't get enough. The fall food alone is sufficient to put me in a jolly mood. I really look forward to giving candy out to all the kids and seeing what fun and creative costumes they come up with.

This year, though, I have a vicious beast in the house- an awesome and terrible monster known as the Beagle-Dragon.

Terrifying, I know.
I made this pet costume several years ago, in high school actually, for my family dog, Dante. I made it for him when he was still a puppy, and it turned out it didn't fit him the following year. Piper, though, is smaller and with a few slight modifications (a few choices snips of the scissors), it now fits her quite well. But who will save us from this terror?

A very stoic savior.
Why, it's Sir Barksalot and his noble steed, Woofyluffagus! They'll keep us (and the trick-or-treaters) safe from the fire breathing creature. My parents are on vacation, so I have two furry friends for a while. I put this costume together for Dante in about two hours yesterday. Would have been less, but certain dogs weren't terribly cooperative.

The Noble Steed costume was very easy to put together. It has a tie around the front and elastic ties around his chest to keep the back half from sliding off. Sir Barksalot wouldn't stay glued in place, so I ended up having to stitch him down with a few hand stitches.

Have a happy Halloween!

October 29, 2012

Onion Roasted Chicken & Veggies

I hope you are weathering the storm well. Near DC, we are experiencing high winds and a steady rain, with it getting stronger all the time, but fortunately we've not been severely impacted yet. We still have power (obviously) and I was able to bake roasted chicken and vegetables for dinner tonight, instead of my power-outage backup plan (peanut butter and banana sandwiches).


This is incredibly easy to throw together and if you line your pan with foil, cleanup is super simple, too.

Onion Roasted Chicken and Vegetables
makes 4 servings

What You'll Need:
4 small chicken breasts
3 large potatoes, cubed
4 carrots, diced
2 Tbs olive oil
1 packet of onion soup mix

The Process:
   Preheat your oven to 400 degrees. Line a 13 x 9 pan with foil and spray with cooking spray to prevent sticking. Combine all ingredients into a bowl and mix until onion soup mix is well distributed.
   Remove the chicken breasts from the bowl and place them into the pan. Distribute the vegetables evenly around the chicken. Bake uncovered for 40-45 minutes, checking potatoes for doneness.


This is also excellent for beef, either cubed or a roast. If you're going to use a roast, instead of just tossing all the ingredients together, I reserve half of the onion mix packet to use as a rub on the roast. Either way, it's simple and satisfying.

Please be careful if you're in the path of the storm. It's dangerous out there, and it's going to get worse before it gets better.

October 19, 2012

Baked Apple Crisp for Two

In an effort not to turn orange, I've put aside the pumpkin this week. I couldn't just ditch all the fall goodies, though. I had some apples laying around and didn't want to do anything too complicated with them. A nice apple bake fit the bill perfectly.

I love the oatmeal topping on these so much. It goes so spectacularly with the apples and cinnamon. You could easily double the recipe to serve a few more people, but for just Hubs and I, it's sometimes nice to make just two servings and not have any leftovers.


Baked Apple Crisp for Two
makes 2 servings, 5 Points+ per serving

What You'll Need:
1 medium/large firm apple (granny smith, etc)
1 tsp lemon juice
1 tbs brown sugar
1/2 tsp cinnamon
dash of cloves
dash of nutmeg

For Topping:
1 tbs brown sugar
1/4 cup old fashioned oats
2 tbs butter, room temp

The Process:
   Preheat your oven to 350 degrees. Peel, core, and dice the apple. Mix apples in a bowl with lemon juice, sugar, and spices until well combined. Divide between two small oven safe bowls. Mix the topping ingredients together with a fork and put on top of apples. Cover and bake for 30 minutes until apples are tender.

For an extra decadent treat, top with a little whipped cream or serve with some vanilla icecream.

October 15, 2012

Pumpkin Steel Cut Oats

All this pumpkin means I'm starting to get creative with it. There's only so much pumpkin bread and pie that one family can handle. I wish I had made this oatmeal sooner, so much sooner, because it is absolutely a delicious way to start the day.


If you recall, I am an avid steel cut oats fan. Mixing pumpkin into it should have been something I thought of ages ago. But, I've made it now and it does not disappoint. I had to alter this one a little bit from my usual steel cut oat recipe, because pumpkin is mostly water and it needed a little extra sweetness.

Pumpkin Steel Cut Oats
Makes 5 servings

What You'll Need:
1 cup steel cut oats
1 cup water
2 cups milk
1 cup pumpkin puree
1/2 cup brown sugar
2 tsp cinnamon
1/2 tsp ginger
1/4 tsp nutmeg
1/4 tsp cloves
2-3 pats butter
optional: 1/2 cup walnuts

October 12, 2012

Classic Pumpkin Pie

I couldn't possibly go through 14 cups of pumpkin puree without making at least one pumpkin pie. This recipe is adapted from the one my father made when I was growing up. I actually haven't made it myself since I was in college. There's usually so much when I head to my parents' house for the holidays that I haven't felt the urge to make my own.


In fact, it turns out that I probably haven't made any pies since college- because I don't have a pie pan! I had to use my cake round for this pie. I should probably rectify this egregious error since I'm in charge of Thanksgiving this year.

Classic Pumpkin Pie
makes 8 slices, 8 Points+ per slice

What You'll Need:
   1, 9" pie crust
   1, 15oz can (or 2 cups) pumpkin puree
   2 eggs
   1, 14oz can sweetened, condensed milk
   1 tsp cinnamon
   1/2 tsp ginger
   1/2 tsp nutmeg
   1/4 tsp all-spice

The Process:
   Preheat oven to 350 degrees. Line pie pan with crust. Mix all the filling ingredients together and pour into pie shell. Bake 45-60 minutes or until toothpick inserted into center comes out clean. Cool on a wire rack. Chill before serving, and top with whipped cream.

October 10, 2012

Cooking a Pumpkin Four Ways

Over the weekend, my in-laws and my nephew came by for a visit. They live quite a ways from us here in DC, so I planned a whole bunch of things for us to do. One of those things included going to the pumpkin patch and doing a bit of pumpkin picking.

Our pumpkin haul.
We went over to a local place and with the price of the hayride, we each got a free pie-sized pumpkin. That means in addition to the pumpkins we bought for carving, we ended up with 5 small pumpkins for pureeing. I weighed them all out and I had 22 pounds of pumpkin!

Growing up, my dad and I made our own pumpkin puree many times, by baking it in the oven. When I started looking around for a time and temp, though, I discovered there are three other ways to cook pumpkin that I never considered- steaming, slow cooking, and microwaving. Since I had more pumpkin than I could fit in my oven, I decided to try out all four ways and see which I preferred.

You can use these methods to cook any pumpkins or squash- just keep in mind that the large pumpkins for carving jack-o-lanterns don't have a very good taste. Stick to pumpkins that are small, under about 6lbs. They're also easier to cut up and cook because they're smaller.

Beginning steps:
   Regardless of method, wash pumpkins off to remove the dirt. I cut off all the stems to make them fit better into their various cooking containers. I used my pumpkin carving knife to do it, just like you would on a jack-o-lantern because it's fast and easy. Then, cut the whole pumpkin in half. Use a serrated knife and cut with a sawing motion. Scoop out the seeds and pulp. If you want to save the seeds, set all the pulp aside in a bowl for later.
   Cut the pumpkin into big chunks. For the crock pot method, you may need a few smaller chunks in order for them to fit. Fewer pieces are better, because later it will be easier to scoop the cooked pumpkin off the rind.

Oven

   Turn your oven on to 325 degrees. Place your pumpkin pieces into a roaster pan with rinds up and add about 1/2 an inch of water to the pan. Put into the oven and bake for an hour. Use a fork to check the tenderness of the flesh. If not quite done, bake for another 15 minutes.

October 2, 2012

It's a Bird! It's a Plane! No! It's Beer Bread!

   I recently made some bread from my Artisan Bread in Five Minutes a Day book. There is a plethora of recipes in there, but one kind of bread is conspicuously missing from their book- beer bread. I love beer, and I love the beers that the fall season brings- the Octoberfests and the pumpkin ales.

   After a little trial and error, I finally came up with a modification to their basic recipe. Most beer breads I've seen are soft loafs that you pour into a loaf pan and bake. But I'm in the market for a crusty loaf, akin to the ones I often make. I started with that recipe for Basic Bread to make my modifications.


   The first batch I tried by replacing half the water with beer. Conveniently, a 12 oz bottle of beer is 1 1/2 cups of liquid- precisely half of the water in the original recipe. I also reduced the yeast by half. The beer flavor was very mild in the resulting bread, and it didn't rise quite as much as it should have. This means I needed more beer, and a little bit more yeast. Another batch was made with these changes, and the result was breaded beery goodness.

Beer Bread
adapted from Artisan Bread in Five Minutes a Day
makes 4, 1lb loafs

What You'll Need:
2, 12oz room temp bottles of beer, I used and Irish Red.
2 tsp granulated yeast
1 Tbs salt
6 1/2 cups unbleached all-purpose flour
a large container, preferably with a lid

The Process:
   When selecting a beer, just remember this is where you'll get almost all the flavor. If paring it with a meal, choose a beer that will go well with your meal. I chose an Irish Red because I like that style a lot. Also keep in mind that the beer has to be room temp in order to get the yeast to activate correctly.

September 28, 2012

Mr. Frosty Mini Quilt!

I finally finished my very first original quilt pattern. I was so inspired to make this snowman that I skipped over Halloween and Thanksgiving and right into winter. It's no surprise, I'm sure, that it's a mini quilt!


I'm a big fan of raw edge applique, so this guy is fused in place and appliqued with a blanket stitch. For some reason, I could never get the blanket stitch to work out right on my old machine. But with my new one, it's a breeze. I love the look that the blanket stitch gives to an applique.

But, now that this one is finished, I have some time to get cracking on a few more patterns... perhaps a spooky ghost or a big-tailed turkey? So many possibilities, so little time.

This mini quilt pattern is available for sale from my Etsy shop.

September 27, 2012

Piper & The Yellow Dog Project

I've talked about my beagle, Piper, here before but she has a secret I haven't mentioned. About a month after my husband and I adopted her, just before last Christmas, she was bitten by an aggressive and unleashed dog in my neighborhood. Thankfully, Piper was not seriously harmed in the encounter, but it terrified her (and it terrified me). I teasingly call her my intrepid beagle now, but in reality, her boldness is just a front.

Piper with her only canine friend, Dante.
Piper, in fact, is quite afraid of dogs because of this experience. Unfortunately, she acts out this fear by becoming aggressive when she's leashed. I've consulted a trainer and I have been working with Piper to ease her fears. She used to go wild just at the sight of another dog. Now she just gets upset when a dog comes within 20 feet or so.

I'm happy I've been able to make progress with her, but there's been a lot of backslides. This is primarily due to other dog owners in my neighborhood who do not understand proper dog greeting protocol. Step 1 is Ask My Permission! They often assume that my cute, floppy-eared dog wants to meet their dog. Even despite my protests (and her growling/barking), some people still come up to us with their dog.

This problem is conflated by the diversity of my apartment complex- there are probably fifteen different languages spoken here, and I only know two (one of them poorly). The best thing I can do in these situations is turn right around and walk briskly away- and I've had to do it. Even if she doesn't act like it with her aggression, Piper is afraid of that dog. She is a Dog In Need of Space (a DINO).

I just heard of a project called The Yellow Dog Project which was created in order to bring awareness to dogs who need space from other dogs "while training, recovering from surgery, or being rehabilitated" or, in Piper's case, for being reactive to other dogs. The idea is that if you see a dog who has a yellow ribbon tied to their leash, they're a dog who needs space and you should not approach them with your dog. You should give them and their owner some space to move away.

What a wonderful idea. It's a movement on an international level, as well, which means if it gains traction, people will know what it means no matter the language they speak (a huge help in my area, for sure). At the time of this posting, 24 countries are represented on their website. The symbol of the yellow ribbon eliminates the verbal element entirely so there is no ambiguity about the situation- it simply means please stay away.


I put my current quilting project aside for a bit this afternoon and made Piper her own yellow ribbon. That strap around her nose is a Gentle Leader (a product I highly recommend) and it not a muzzle. It goes around the back of her head and around her nose, allowing me better control of her so that when she does start acting foolish, I can direct her face away from the dog so she's not looking at it anymore. It's been a godsend in helping me to retrain her dog aggressive behavior.

I'm not expecting any immediate results with the ribbon, but it's something that's easy to explain to people, and something they might even ask about. It almost advertizes itself. The Project is looking into getting ribbons and shirts of their own to sell. I will be first in line to buy a shirt when they come out.

Please help them and pass the word along about this fabulous project. They're on Facebook currently, and I'm sure they'll join Twitter soon.

Basic No-Knead Bread Recipe

   One of my favorite small pleasures in life is taking a bite of really good bread, particularly if I've used it to sop up a little something from my dinner plate. Buying a nice loaf of crusty bread, though, can be quite hit or miss. My local grocery store wouldn't know a baguette if one hit them in the face and sang Frère Jacques- their "baguettes" are a soft and bland.

A nice, big boule.

   But I don't buy that bread anymore because I learned how to make my own at home. I tried a lot of recipes and made a lot of mistakes. Then, I received a wonderful book called Artisan Bread in Five Minutes a Day as a gift. I learned a ton about baking bread and why my previous trials had turned out poorly. I use their Master Recipe quite often for a basic bread that's good for any occasion.

   I highly recommend their book for those of you who are looking to try baking bread at home but aren't sure where to start. There are tons of different kinds of bread for you to try, too. It doesn't take very long to make the dough, and there is no kneading necessary!

Basic Bread
from Artisan Bread in Five Minutes a Day
makes 4, 1lb loafs

What You'll Need:
   3 cups lukewarm water
   1 Tbs granulated yeast
   1 Tbs salt
   6 1/2 cups unbleached all-purpose flour
   a large container, preferably with a lid

The Process:
    Put your warm water, yeast, and salt into your container. Dump all the flour in at once and mix well. I prefer to do this step with a wooden spoon, but if you have a fancy mixer with dough hook, feel free to go that route. Once all the flour is incorporated, you'll be left with a wet, sticky dough. This is exactly what you want. Loosely cover with your lid (or plastic wrap in a pinch) and let rise for two hours.

September 25, 2012

Shepherd's Pumpkin Pie

I heard about this delightful autumnal recipe through a friend's recommendation. It combines the warm, comfort food aspect of the traditional Shepherd's Pie with my favorite fall food, pumpkin. What's not to love? The recipe passed to me came from My Recipes, but I changed quite a few things about it.


First, I decided not to roast the pumpkin. It seemed needlessly time consuming when I had a perfectly good can of pumpkin puree on hand. I thought that adding cream to the pumpkin was an unnecessary addition of calories (as well as a trip to the store). I also halved the recipe, since I'm cooking for two and don't want a ton of leftovers. Honestly, I made a lot of changes.

Shepherd's Pumpkin Pie
makes 4 servings

What You'll Need:
1 lb lean ground beef
2 carrots, sliced
1 medium onion, diced
3 cloves garlic, minced
3 Tbs Worcestershire sauce
3/4 cup red wine (or one of those handy mini187ml bottles)
1 cup beef stock
1 15 oz. can pumpkin puree
1 tsp cumin
1/2 tsp thyme
1/2 tsp ground pepper
1/2 tsp salt
1/4 tsp cinnamon
1/8 tsp sage 1 Tbs corn starch

The Process:
Preheat oven to 400 degrees. Cook the ground beef over medium heat, breaking it up as it cooks. Drain. Add the Worcestershire sauce, wine, half of the beef stock, carrots, onions, garlic, cumin, thyme, pepper, and 1/2 tsp salt to the pan. Cook over medium heat for ten minutes.

While the beef mixture cooks, combine the pumpkin puree with a pinch of salt, sage, and cinnamon. Set aside. Then, whisk the cornstarch into the remaining beef stock and add to pan with the beef. Cook for another minute or two until thickened.

Pour beef mixture into a greased 8x8 pan. Evenly spread the pumpkin puree over the beef mixture. Bake uncovered for 20-25 minutes. Leftovers can be refrigerated.

September 21, 2012

Slow Cooked Chicken Pot Pie

My neck of the woods has thoroughly fallen into autumn. For over a week, we've had 75 degree days and 50 degree evenings, just absolutely wonderful weather that makes you yearn for a hearty dish. Tonight I just had to make something in the spirit of this weather. I have quite a bit of chicken on hand, so a chicken pot pie was an easy choice.

But I didn't really want to heat up my whole place by turning on the oven to bake one. Where do I always turn in times of temperature crisis like this? To my trusty crock pot, of course. This is a really easy way to make that savory pot pie dish without using your oven, or having to worry about over baking a crust (as I am known to do).

My vegetables were carrots, peas, lima beans, and potatoes.
Slow Cooked Chicken Pot Pie
makes 6 servings

What You'll Need:
 4 boneless chicken breasts, thawed
 2 cans cream of chicken soup
 1 cup sliced celery (I'm not a fan, so I traded it for a diced potato instead)
 1 medium onion, diced
 2 cloves garlic, mince
 1 bay leaf
 1/2 tsp marjoram
 1/4 tsp sage
 1/2 tsp thyme
 1/2 tsp rosemary
 1/2 tsp black pepper
 salt to taste (I added 1/2 tsp)
 2 cups of cut fresh veggies- carrots, peas, corn, etc OR a 1lb frozen bag mixed veggies
 6 biscuits, either prepackaged or homemade (I'm posting a recipe for some soon)

September 14, 2012

Homespun Honey Quilt: The Top

After much delay, I finally finished the top of the Homespun Honey Quilt I've been working on for quite some time. Between the sewing machine death and and other projects getting in the way, this one fell to the wayside.


I haven't quilted it up yet, but it's ready to go whenever I am. I have the backing and I bought some fabric recently to make the binding. There should be some batting laying around with this project in mind, too.

Lately I've been on a project finishing kick and hopefully this one will get sucked up in that finishing fervor. There were a lot of projects I had laying around (something in the vicinity of 16) so finishing things up and not starting new projects has been really good.

September 5, 2012

Eek! A Halloween Mini Quilt

 This mini quilt came from a quilting magazine I like a lot, Quilts and More. In the most recent issue for fall, there were two patterns for cute Halloween pillows. The finished pillows were 22" square, but I really don't have anywhere to use them. Instead, I decided to use the spiderweb applique pattern to make a mini quilt.

 
The original applique pattern was intended for a 22" pillow, not a 12" mini quilt, so I had to do a little tinkering. I scanned the original applique from the magazine pullout into my computer. I had to do 4 separate scans, because my scanner isn't large enough to capture the whole image at once. I stitched the image back together on the computer, and then shrank it down to fit in the center square, about 8".

It only took about 40 minutes from start to printing out the resized applique. After I cut out the applique, it took about 4 hours to cut, sew, applique, quilt, and bind this little guy. Fall, in my opinion, starts on September 1st, so this Halloween addition to my decor is only a wee bit early.

I've started drafting some designs for other mini quilts- including a fall one and a snowman. I've been a bit under the weather the last few days, but with any luck I'll be able to get them finished by next week. Those patterns will be available on my Etsy shop after I've tested them out and worked out the instructions list.

September 3, 2012

I Pinch! Mini Crab Quilt

After finishing up a large project like the Halloween Circle Quilt, I like to take some time to work on a smaller project. Nothing big or fancy, just something I can finish in a couple hours or an afternoon. I bought a small table-top quilt hanger ages and ages ago along with a small quilt kit to fit on it.

 
I thought it was about time I finished this quilt up. I cut out the appliques and stitched the top together last summer and then set it aside for other things. With my big quilt finished, it was the perfect opportunity to finish him up.

I changed the applique a little. The crab had eyestalks in the original pattern- but any good Marylander will tell you that crabs don't have eyestalks! So I left those off and placed the eyes on his body. The quilt kit and frame came from the Wooden Bear, they had a booth at a show I attended last year.

They have two sets of "Little Quilts", one for each month of the year (and a birthday cake, too). For the most part, the patterns a little too folky for my taste but the idea of having a small frame to hang interchangeable quilts on really appeals to me. The frame itself will hold a 12"x12" quilt, but I could also fit one that's up to 16" long on it. This frame and several other sizes and styles are available from Ackfeldwire.

Before starting up another large project, I think I am going to design a few of these mini quilts. They take only an afternoon to complete and you don't need much fabric for them at all. I finished up a Halloween one already, but I see Thanksgiving and Christmas ones in my future.

August 29, 2012

Halloween Circle Quilt: finished!

I wasn't able to finish quilting this one for ages, because of the machine snafu I had last fall. Then, the darning foot I needed for my new machine was out of stock for several months before I found out that was due to it being discontinued. This quilt has had quite a journey but, it's all sorted now.


I'm really happy with how it came out. The sashing is a solid black. I thought it would work best since the blocks themselves are quite busy. Inside of each block, I quilted spider web patterns.


I bought a Haunted Mansion layer cake by Moda and that's where the blocks and circles were cut from. I'd never used a layer cake before, but there was no resisting the siren call of such a fun Halloween themed collection.


The binding was made with one of the polka dot prints from the Haunted Mansion. I made it way, way in advance so it was ready when the top was finished. I hate nothing more than being ready to bind a quilt and chalk it up in the finished column and the binding isn't ready. I try to make it between cutting out the pieces and piecing the top.


I did a meandering stitch across the sashing and the border, which is my go-to quilting pattern. I don't prewash the fabrics I want to meander across, because the slight shrinking of the fabric after the fact gives it a delightful look and feel.

This quilt is currently for sale in my Etsy shop.

August 28, 2012

Civil War Era Chocolate Pudding

 Today is going to start a new little segment called Test Kitchen Tuesday. I talk quite a bit about recipes I've had to work on several times to get right, but I only post the final recipe. I thought it might be interesting to talk about the process I go through while working things out. In the spirit of that, I decided to start with a recipe that immediately needed some changes.


A dear friend of mine works at a Civil War museum and each week they post a recipe from the period. This past week's sounded not only delicious, but also something I could readily make. It was a baked chocolate pudding. Our great-great-grandmothers weren't quite the sticklers we are for measurements, so at the very least I needed to translate the ingredients into modern measurements.

 The recipe I worked with was as follows:
Have the best and strongest American chocolate or cocoa. Baker’s prepared cocoa will be found excellent for all chocolate purposes; better indeed than anything else, as it is pure, and without any adulteration of animal fat, being also very strong, and communicating a high flavor. Of this, scrape down, very fine, two ounces or more. Add to it a tea-spoonful of mixed spice, namely, powdered nutmeg and cinnamon. Put it into a very clean sauce-pan, and pour on a quart of rich milk, stirring it well. Set it over the fire, or on hot coals; cover it; and let it come to a boil. Then remove the lid; stir up the chocolate from the bottom, and press out all lumps. Then return it to the fire, and when thoroughly dissolved and very smooth, it is done. Next stir in, gradually, while the chocolate is still boiling-hot, a quarter of a pound or more of powdered loaf-sugar. If you use such white sugar as is bought ready powdered, you must have near half a pound, as that sugar has very little strength, being now adulterated with ground starch. When the chocolate is well sweetened, set it away to cool. Beat eight eggs very light, and pour them through a strainer into the pan of chocolate, when it is quite cold. Stir the whole very hard. Then put it into the oven, and bake it well. Try it when you think it done, with a twig from a broom. If on putting the twig into the middle of the pudding, and sticking it quite down to the bottom, the twig comes out clean, and with nothing clammy adhering to it, the pudding is then sufficiently baked. It should be eaten cold. Sift white sugar thickly over it before it goes to the table. It will be found very nice.
This pudding will bake best by sitting the pan in a dutch oven half-filled with boiling water.

From: Leslie, Eliza. Miss Leslie's Lady's New Receipt-book: A Useful Guide for Large or Small Families : Containing Directions for Cooking, Preserving, Pickling. Philadelphia: A. Hart, Late Carey & Hart, 1850. Pg. 127-128
 The first step I took was to write out each of the ingredients in a list, as we do now, and translate their quantities to measurements we use now. I didn't know, without looking it up, that 1lb of sugar is equal to two cups. So, a quarter pound of sugar is half a cup. At this stage, I also made the executive decision to add a little vanilla to the recipe.

August 25, 2012

House of Leaves: Book Nook

This little treasure was recommended to me by a college friend, and let me tell you- it's something else. House of Leaves was written by Mark Z. Danielewski. Very interesting, particularly because of the way it's put together. You follow two stories- the story of the narrator and the story of the House. Well, of the people in the House.


 I don't want to give too much away, but it's a truly thrilling and engaging read. It's also a little mind bending. Not just because of the duel story lines, but also because of the fantastic subject and the way it's laid out. You'll read this book sideways and upside down- literally. It's a big book, but there are endless footnotes and endnotes.

The endless source citations are fascinating for a number of reasons. First, the book is entirely fictional, so many of the sources are entirely made up. Coupled with my background in English, this was completely hilarious. It made a complete mockery of every academic paper I ever wrote.

But, it also shows how easy it is to make something seem completely substantiated. Just having the footnotes gives a serious weightiness to the words. It doesn't even matter many of them are fake. We're trained to trust footnotes without ever looking them up. It's a really interesting critique.

You can't find it as an eBook because of the formatting, so you'll have to read it the old fashioned way. I must caution you not to drink alcohol while reading this book. It'll freak you out if you're intoxicated. Honestly, it will probably freak you out even if you're sober and just reading it in the dark. I wouldn't call it horror, so much as suspense, although it has elements of both.

August 15, 2012

How To Re-Cover a Folding Chair

I have a confession- I'm a trash-picker. It must be something genetic I got from my father because he is the master of finding tarnished treasures. It helps that he has a variety of tools and experience to make even really damaged items like new again. I don't, so I only retrieve things that can be fixed with hand tools and elbow grease.

In this case, I found a folding chair sitting next to the dumpster. It was a perfectly fine chair except the fabric on the backing was ripped. It's such an easy thing to fix! Of course, you could always just decide you'd like to spice up some regular folding chairs, too.

Doesn't look like much now.
 There are screws that hold the back rest and the seat in place. Just unscrew them and the two cushions will come right off.

Gross.
The chair itself was pretty dirty, so I cleaned it up before I put the newly covered cushions back on.


Here are the back of both cushions, where you can see how the original fabric was stapled in. Rather than unstapling the current fabric and padding, I decided to simply cover the new fabric over the old. It's a lot quicker and easier this way.


I had a fun upholstery fabric laying around leftover from another project I decided to use. I set the cushions over top of it and cut out a piece big enough to fold over the back.

August 6, 2012

Udon Noodle Soup

It's been ridiculously hot out, so why am I making soup? Because I needed it. For days, I was aching for some Udon soup and no place nearby is kind enough to make some that isn't terrible. The obvious solution was to make it myself. Never having done so, however, it was a bit of a challenge.


If you don't make Japanese or Chinese food often, you'll probably have to pick up a few more ingredients than I did. You can find dashi in the ethic section of your grocery store or an Asian market. If you can't find any easily, you can use a seafood soup base with similar results.

Udon Noodle Soup
Adapted from Bon Appetit
makes 2 servings

What You'll Need:
1 Tbs dashi (powdered soup base)
1 Tbs reduced-sodium soy sauce
1 tsp lime juice
2 tsp rice wine
2 tsp sesame oil
1 shiitake mushroom, sliced
2 green onions, thinly sliced
2 cups spinach, cut up
2 carrots, sliced
8 ounces udon noodles, fresh if available (I could only find dried)

The Process:
Boil the noodles according to the directions on the package. If you have dry noodles, the instructions are in Japanese, and you can't read Japanese (which is what happened to me), then boil 4 cups of water and cook the noodles for 12-13 minutes, until the center is tender.
While the noodles cook, put 3 cups of water into a pot and heat to a boil, adding the dashi, soy sauce, lime juice, rice wine, sesame oil, carrots, green onions, and mushrooms. Turn heat down to medium and simmer until the noodles finish cooking. Divide your chopped spinach between the two bowls. Once the noodles are done, using tongs, divide them in half and put into serving bowls. Ladle the soup over top and serve immediately.

I used spinach and carrots as my vegetables but you could swap them out for any number of things: snow peas, green beans, asparagus, mini corn, etc. Unless you don't like mushrooms you should keep them in because they add a nice depth to the flavor. The texture of mushrooms skeeves me out, so my solution is to make it with the mushrooms and then put all of them into Hubby's bowl.

It can get a little spendy on the dashi, sesame oil, and rice wine if you don't have them already, but they keep for a while and they're also used in tons of different Asian recipes, so you can get a lot of mileage out of them. Or, if you're not as adventurous, you could just make this recipe over and over.

August 2, 2012

Brining and Roasting A Cornish Game Hen

I did a fun/crazy thing this year and volunteered to host Thanksgiving for my parents. Now you're probably thinking, "well, so what? It's August". The thing is- I have this just one teeny, tiny detail: I've never cooked a turkey before. I should have thought of that perhaps before offering, but here we are.

So, in the hopes that I won't ruin Thanksgiving, I've decided to start learning how to cook a whole bird that doesn't turn out dry and leathery. The overwhelming consensus is that to achieve such perfection, I should brine the bird. I decided to start small, and opted to begin with a whole Cornish Game Hen rather than going straight to the turkey. My mom used to make fantastic hens when I was growing up, and they're cheaper so if I screwed up too badly, it would be alright.


There are a couple things you should know before diving into brines. The first is make sure you get an all natural bird, one that hasn't already been prepared with sodium. You'd get salt overload if you brined one of them. Secondly, and this is more a matter of preference, don't use iodized salt (like table salt). Apparently, in such high quantities, it gives a slightly metallic taste to the meat. I used kosher salt.

Rosemary and Sage Cornish Game Hens
makes 2 whole hens, 4 servings

What You'll Need:
2 Cornish Game Hens, thawed
1 gallon water
3/4 cup kosher salt
1/4 cup sugar
1/4 cup brown sugar
1 cup white wine, I used a Chardonnay
1/4 cup lemon juice
1 Tbs cracked pepper
3 cloves garlic, minced
1/4 cup rosemary
15-20 sage leaves
3 green onions, diced

August 1, 2012

I Shall Mince Garlic No More

Mincing garlic has always been a hassle to me. I don't like doing it and the garlic always comes out uneven no matter how careful I am. My dog probably has better knife skills than I do, despite her lack of thumbs, so I'm a little out of my element trying to mince it anyway.

I decided it was time to move on from cutting it by hand and upgrade to a garlic press. Well, that didn't work out so hot. I spent $18 on a press (from a reputable kitchen accessories company) and the thing broke on my second use. It was also wasteful and a pain to get clean. I search around the web for some other options, and eventually found The Garlic Twist, 3rd gen.


This little device is ridiculously easy to use. You peel the cloves, put a one or two in the bottom half, place the top half on over top (aligning the teeth) and twist a few times. Bam, done. You can also twist it in such a way that the garlic will collect in a triangle on each side of the teeth for easier removal, like this:


I use a novelty mini-spatula to scrape the garlic out and into the pan-pot-bowl-whatever I'm using it in. You could also use a small spoon. It does waste a little garlic that gets stuck in the teeth, but not nearly as much as the garlic press wastes. As soon as I'm finished with it, I rinse it out with a little soap and warm water, and it's clean.

It takes less than two minutes to peel the clove, mince it, and rinse it. Their advertisement mentions that back of one half is a nice smashing tool to use to loosen the garlic, and it actually is rather handy for that purpose. It works better than the side of a knife (my old method).

The twist cost me about $18 (after shipping) which is the same amount I spent on the press that broke. Overall, I am incredibly happy with it and I use it several times a week. I definitely recommend you get one if you use garlic often, nothing beats fresh garlic!


*Note: I have not been compensated for this product review. I am not endorsed or affiliated in any way with the makers of the Garlic Twist. I simply liked the product and wanted to share my experiences with it.

July 25, 2012

Sweet Potato Pudding

Against my better judgment, I used the oven tonight and, as expected, it heated up the whole apartment. But, I have to say it was entirely worth it for this lovely little dessert. Last trip I made to the store, I picked up some sweet potatoes and was surprised to find three distinct varieties in addition to a pile of "yams". 

These "yams" looked like the sweet potatoes I always ate as a kid, so I picked them up and they were exactly what I wanted. It got me to thinking, what exactly is a yam? Is it a sweet potato? Or perhaps the other way around? Turns out, that no, yams and sweet potatoes are not the same. Who knew?

They're not in the same family, and there isn't even a species of yam native to the US. Most grocery stores sell "yams" that are really sweet potatoes, real yams are generally only found in international markets. In the US, the term "yam" came into use for sweet potatoes from slaves, because it was similar to the actual yam they knew in Africa. Vernacular can be a trickster like that.

Forgive my linguistic indulgence, I find that sort of thing fascinating- but now back to the pudding. While doing my sweet potato vs. yam research, I came across a fabulous sounding recipe on this site that discusses the differences and includes a few recipes.


Sweet Potato Pudding
Adapted from Tennessee Old Maid’s Sweet Potato Pudding from Classic Home Desserts

What You'll Need:
1/2 stick butter, room temp
1/2 cup packed brown sugar
1/4 cup sugar
2 large eggs
1 teaspoon ground cinnamon
1/4 teaspoon fresh grated nutmeg
1/8 teaspoon ground clove
2 1/2 cups grated raw peeled sweet potato (about two medium potatoes)
1 1/2 cup milk

July 23, 2012

Quilting is Back On!

I finally found and received the darning foot I needed for my machine. Woo! I also bought a pack of 20 bobbins. You can never have too many bobbins, and since these are "exclusive" to my machine, I figured I'd better stock up. I love my L-500 to pieces, but the fact that it's no longer sold and supported means I will have a very hard time getting replacement components in the future. Very disappointing, especially considering the cost of the machine.

Isn't it lovely?
 Now I'm back in the saddle and ready to finish some project have have been hanging over my head for quite some time. The first up is the Halloween quilt! I know it's "Christmas in July" time, but Halloween is coming up sooner, so I decided to finish this one up first. It feels good to be back at the workstation.

 
Another eight hours or so of quilting and then it'll be ready for the binding. I'm very excited to finish up the quilted webs. They're not terribly complicated, but do involve a lot of maneuvering. Ages ago, I cut and pressed the binding, so once the quilting is finished, I can wrap it up in a breeze. I have a tight painting schedule to keep to for my Warhammer army, but hopefully I can sneak in some time this week to work on the quilt.
Related Posts Plugin for WordPress, Blogger...